micro:bit Animated Animals
In this activity you will explore how to create a simple animation on the BBC micro:bit’s LED display by coding an animation on the MakeCode platform. By using code blocks with built-in icons and custom modifications, students will learn to program the micro:bit to a two sequence animation.
This lesson starts out by practicing animations using the built in icon of a duck, followed by a slightly modified version where all the LED lights are shifted down by one row. By alternating these two image versions, with a brief delay between them, the duck appears to be animated. This new animation gives the illusion of the duck icon bobbing up and down. When we use a forever loop the animation continues to display on the micro:bit until it is turned off or unplugged.
This activity introduces students to the concept of iteration, demonstrating how loops allow loops allow programs to be simplified and minimizes unnecessary repetition. After mastering animation the duck students can continue to practice creating additional animations using other built in icons, or creating their own unique icons to animate using the LED Planning Sheet.
Materials
-
Project Code
https://makecode.microbit.org/S96056-77348-95342-79815 -
Project hex file for micro:bit
https://drive.google.com/file/d/1GJ6p4Ds2gbzQz8tYdriT_W90C7eKkZx4/view?usp=drive_link -
LED Duck Bobbing
https://drive.google.com/file/d/1ffl5ZIhy7kWl8KFwL35u0-16Wh6vXPoQ/view?usp=drive_link -
LED Images
https://drive.google.com/file/d/1qLRojEO5LAJ6GMjnybx0BBmROudXMXgG/view?usp=drive_link -
Example Final Duck Code
https://makecode.microbit.org/S36960-65051-64057-06348
Tips for Running Activity
- Start of discussing with students if they have ever seen a duck bobbing up and down in the water? Ask students to describe the scene to you.
- Using the activity slides discuss the following slides:
- Slide 1: Ask students if the duck in the image is moving.
- Slide 2: Show an image of two ducks. Tell the students the ducks in the pictures are the SAME duck, and the image was taken just seconds apart. Ask the students if they think the duck is moving or not. What evidence do they have to support that it is moving? Looking for students to notice that the duck in position #2 is higher in the water. As the water moves the duck would be “bobbing up and down.” If students are not familiar with the term “bobbing” then take a moment to talk about this new word, its meaning, and common uses (i.e. bobbing for apples).
- Slide 3: Ask the students to predict what position the duck would be in if we took another picture of the same duck.
- Slide 4: This slide is included in case students need a suggestion or multiple choice option for the next image of the duck.
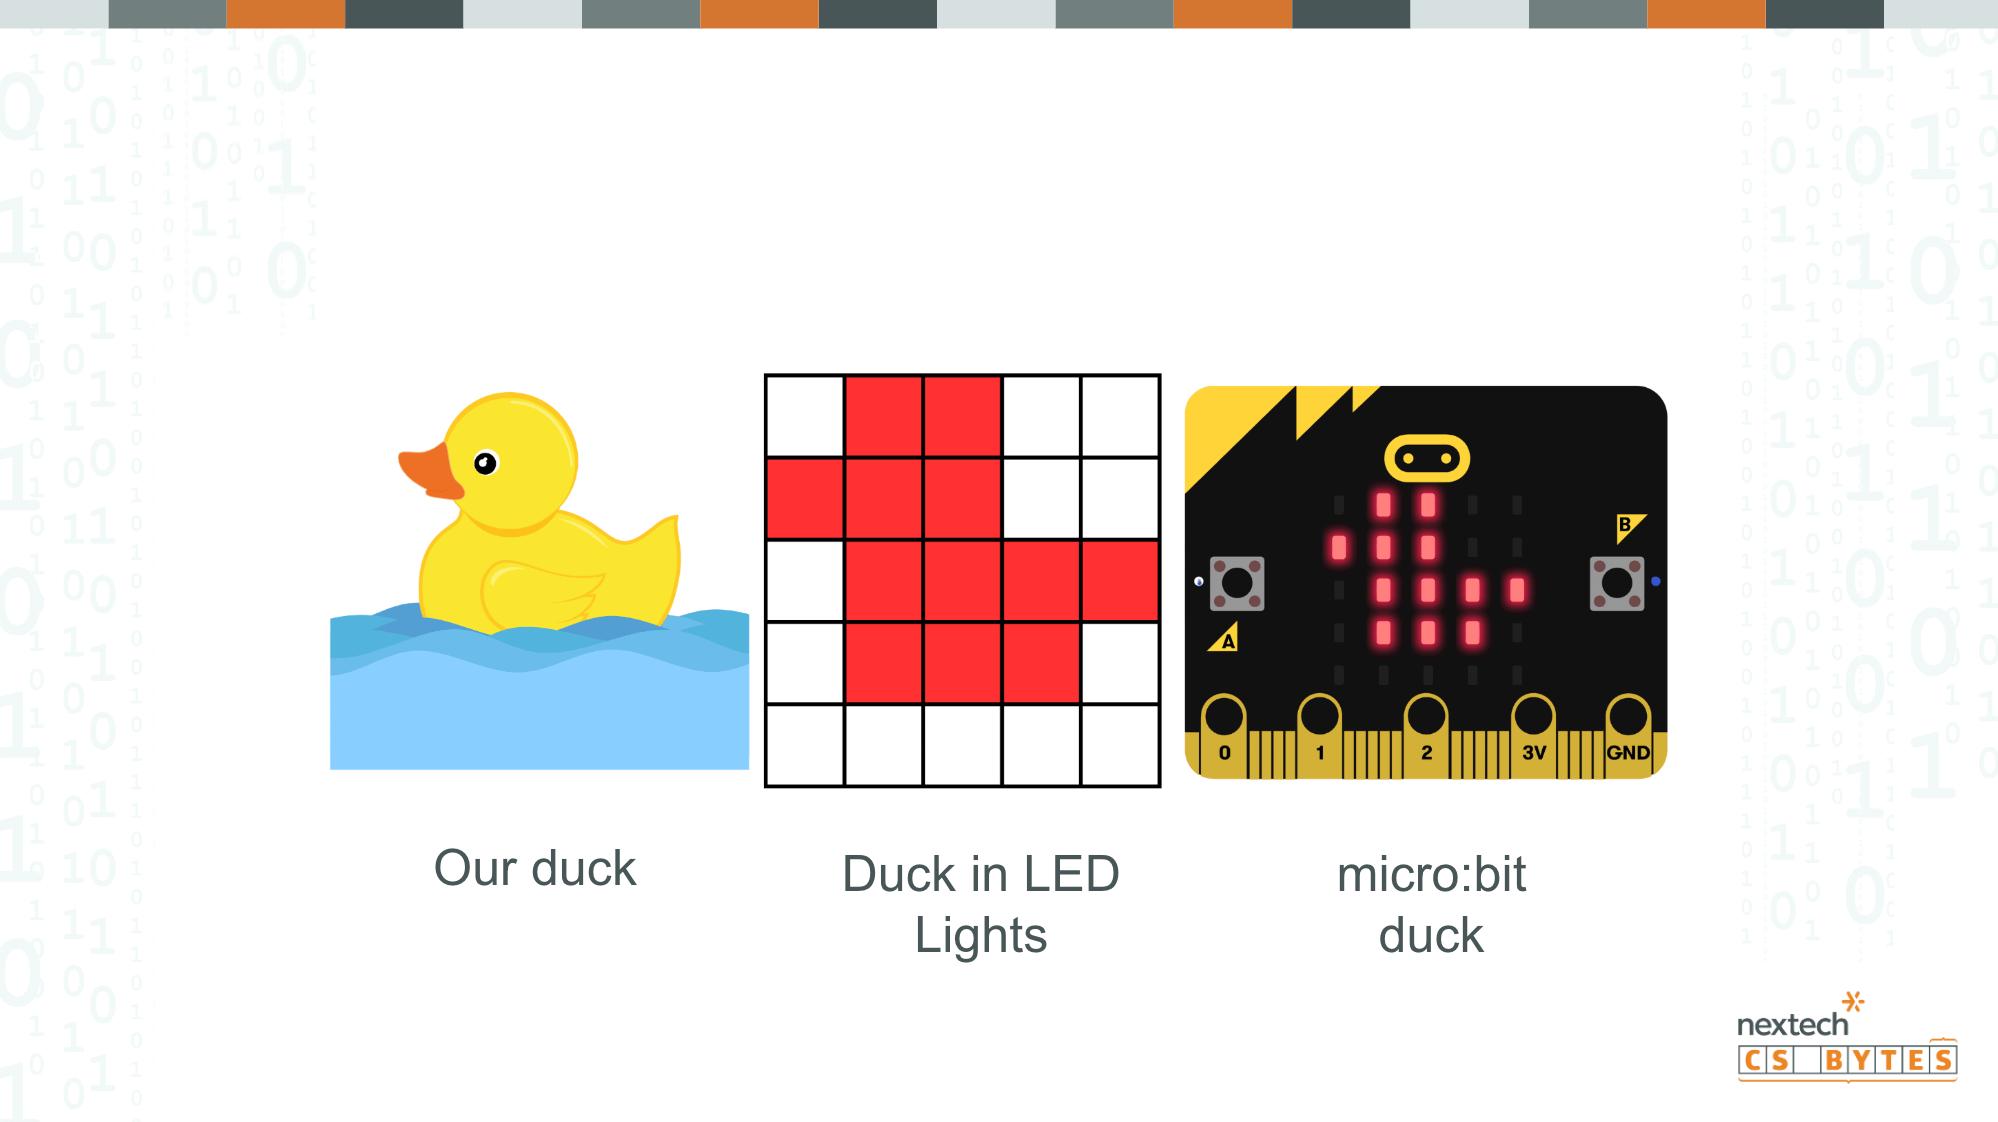
- Slide 5: Since our goal is to code animate an animal on a micro:bit this slide shows students what the image of the duck would look like in LED lights on a micro:bit. The micro:bit has 25 individually programmable LED lights that can be turned on/off to create simple images.
- Slide 6: This slide shows all three ducks.
- Slide 7: Using the micro:bit we can use a series of code blocks to an animation of the duck bobbing up and down. This slide can be used to introduce the sequence and plan out the LED lights by coloring in the blocks. Students can follow along on their own using the LED Duck Bobbing worksheet
- Slide 8: Now that students have planned out their duck LED images, the next step is to program the code blocks to match. This slide introduces students to the code blocks. It is important to discuss that students will need to individually click on each light to create the image they wish to make. NOTE: there is a code black called “show icon” that includes an already programmed duck in the “up” position. It is not suggested to use that block at this time because students can not edit the LED in that code block.
- Slide 9: What is different between these two animations?
- Slide 10: The importance of the pause block
- Slide 11: Adding a pause
- Slide 12: Completing the Animation
- Slide 13: Animation Extensions:
- Can you animate the duck to turn on its side?
- Can you animate the duck to go upside down?
- Can you animate a flower to grow up from a seedling to a bloom?
- Can you make another animal dance?
- Create an animation of your choice.
- Start of discussing with students if they have ever seen a duck bobbing up and down in the water? Ask students to describe the scene to you.
- Using the activity slides discuss the following slides:
- Slide 1: Ask students if the duck in the image is moving.
- Slide 2: Show an image of two ducks. Tell the students the ducks in the pictures are the SAME duck, and the image was taken just seconds apart. Ask the students if they think the duck is moving or not. What evidence do they have to support that it is moving? Looking for students to notice that the duck in position #2 is higher in the water. As the water moves the duck would be “bobbing up and down.” If students are not familiar with the term “bobbing” then take a moment to talk about this new word, its meaning, and common uses (i.e. bobbing for apples).
- Slide 3: Ask the students to predict what position the duck would be in if we took another picture of the same duck.
- Slide 4: This slide is included in case students need a suggestion or multiple choice option for the next image of the duck.
- Slide 5: Since our goal is to code animate an animal on a micro:bit this slide shows students what the image of the duck would look like in LED lights on a micro:bit. The micro:bit has 25 individually programmable LED lights that can be turned on/off to create simple images.
- Slide 6: This slide shows all three ducks.
- Slide 7: Using the micro:bit we can use a series of code blocks to an animation of the duck bobbing up and down. This slide can be used to introduce the sequence and plan out the LED lights by coloring in the blocks. Students can follow along on their own using the LED Duck Bobbing worksheet
- Slide 8: Now that students have planned out their duck LED images, the next step is to program the code blocks to match. This slide introduces students to the code blocks. It is important to discuss that students will need to individually click on each light to create the image they wish to make. NOTE: there is a code black called “show icon” that includes an already programmed duck in the “up” position. It is not suggested to use that block at this time because students can not edit the LED in that code block.
- Slide 9: What is different between these two animations?
- Slide 10: The importance of the pause block
- Slide 11: Adding a pause
- Slide 12: Completing the Animation
- Slide 13: Animation Extensions:
- Can you animate the duck to turn on its side?
- Can you animate the duck to go upside down?
- Can you animate a flower to grow up from a seedling to a bloom?
- Can you make another animal dance?
- Create an animation of your choice.
Extension Opportunities
- Advanced Animation Prompts
- Turn the duck on its slide
- Make the duck rotate round the “screen”
- Can you animate the duck to go upside down?
- Can you animate a flower to grow up from a seedling to a bloom?
- Can you make another animal dance?
- Create an animation of your choice.
- Ready for a more advanced interaction with a virtual pet?