AI Movement Timer with micro:bit + CreateAI
In this activity, students explore artificial intelligence by transforming the traditional “exercise timer” into a flight tracker for a toy, paper, or craft airplane. Instead of recognizing exercise vs rest, students train a machine learning model to identify different flight motions such as flying and not flying.
Note: this is a Nextech remix of the BBC micro:bit activity “AI exercise timer.” While the linked resources provide instructions for the original activity, the instructions below guide you in modifying it to create a flight movement timer.
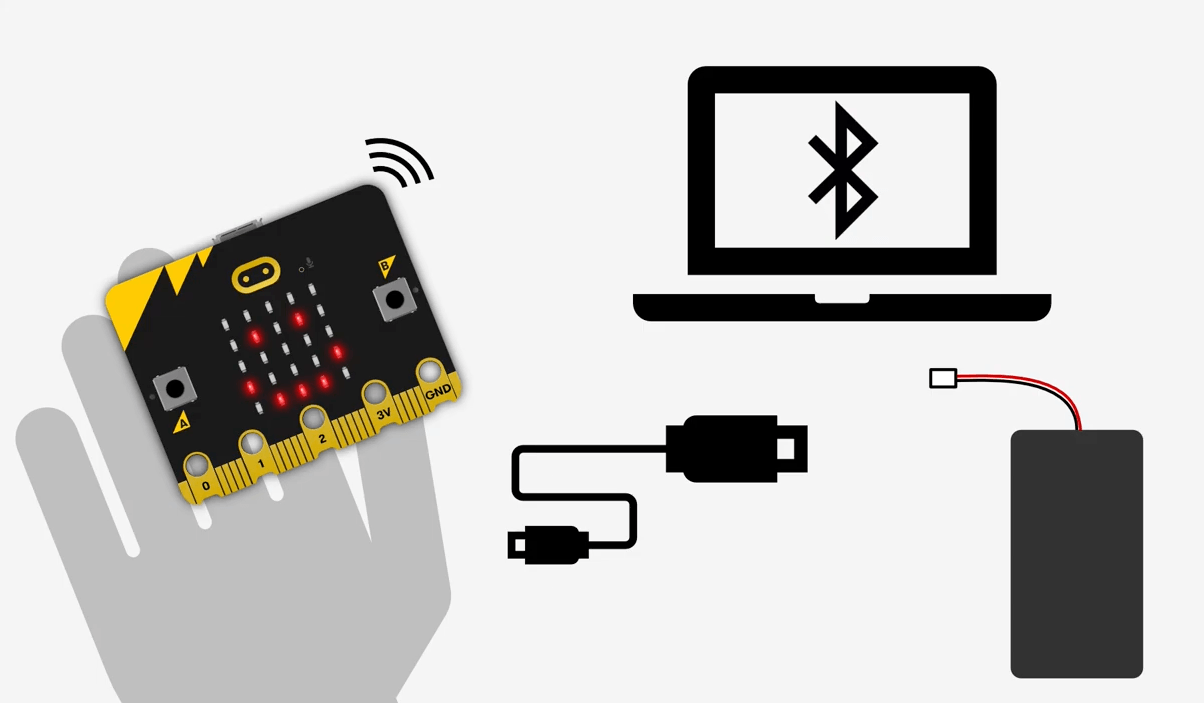
Materials
-
micro:bit Simple AI exercise timer instructions
https://microbit.org/projects/make-it-code-it/simple-ai-exercise-timer/ -
micro:bit CreateAI base data
https://createai.microbit.org/import?id=simple-ai-exercise-timer&project=Project%3A%20Simple%20AI%20exercise%20timer&name=Simple%20AI%20exercise%20timer&editors=makecode
Activity Instructions
- Introduce the Activity
- Today, you’re going to teach a micro:bit and CreateAI to recognize and track the movements of a plane we make in class.
- Describe types of plane movements and non movements.
- Introduce AI & Machine Learning
- Machine learning means teaching a computer using examples instead of step-by-step instructions.
- Explain simply:
- You give examples (dataset)
- The computer finds patterns in the data
- It predicts what new inputs are
- We’re going to teach it to recognize movements
- Define Flight Movements
- Recognize that there are many types of flight movements for an airplane, but in order to more age appropriate we are only going to ask that the AI recognize when the plane is is “flying” or “not flying”
- Flying → any in the air motion, in the air loops, etc.
- Not flying → no motion
- TIP: make sure your “flying” motion is not a steady straight line or the AI can confuse this for the plane at rest.
- Collect Training Data
- Open CreateAI –
- Option 1: use the existing “AI exercise timer” code links and rename the project and the data. Also create new LED images.
- Option 2: Create a new project in CreateAI
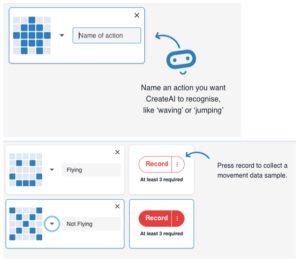
- Name your actions “Flying” and “Not flying”
- Record multiple samples for both actions. Try to make the movements in each action data set different from each other.
- Train & Test the Model
- Train the Model and Connect your micro:bit
- Students:
- Train model
- Test movements
- Discuss:
- Does it recognize each phase correctly?
- Where does it get confused?
- Improve the Model (Iteration)
- AI gets better with better data. Are there any classes that need more data to help improve the accuracy of detecting the movements correctly?
- Students:
- Add more sample data to the classes
- Remove incorrect ones
- Retrain and test
- Add the Timer Code
- Now we track how long each flight phase lasts.
- Explain:
- Variables track time for each movement
- When movement starts → timer runs
- When movement stops → time is stored
- Controls (if using the original BBC micro:bit exercise timer code replace all exercising working with “flying” and all not exercising with “not flying”):
- Button A → show not time
- Button B → show not flying time
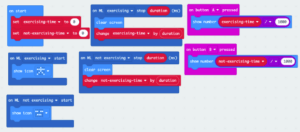
- Walk students through creating the following code or use the completed code link (provided within MakeCode) to share the completed code with students.
- Open project in MakeCode
- Test the Flight and timer System
- Introduce the Activity
- Today, you’re going to teach a micro:bit and CreateAI to recognize and track the movements of a plane we make in class.
- Describe types of plane movements and non movements.
- Introduce AI & Machine Learning
- Machine learning means teaching a computer using examples instead of step-by-step instructions.
- Explain simply:
- You give examples (dataset)
- The computer finds patterns in the data
- It predicts what new inputs are
- We’re going to teach it to recognize movements
- Define Flight Movements
- Recognize that there are many types of flight movements for an airplane, but in order to more age appropriate we are only going to ask that the AI recognize when the plane is is “flying” or “not flying”
- Flying → any in the air motion, in the air loops, etc.
- Not flying → no motion
- TIP: make sure your “flying” motion is not a steady straight line or the AI can confuse this for the plane at rest.
- Collect Training Data
- Open CreateAI –
- Option 1: use the existing “AI exercise timer” code links and rename the project and the data. Also create new LED images.
- Option 2: Create a new project in CreateAI
- Name your actions “Flying” and “Not flying”
- Record multiple samples for both actions. Try to make the movements in each action data set different from each other.
- Open CreateAI –
- Train & Test the Model
- Train the Model and Connect your micro:bit
- Students:
- Train model
- Test movements
- Students:
- Discuss:
- Does it recognize each phase correctly?
- Where does it get confused?
- Train the Model and Connect your micro:bit
- Improve the Model (Iteration)
- AI gets better with better data. Are there any classes that need more data to help improve the accuracy of detecting the movements correctly?
- Students:
- Add more sample data to the classes
- Remove incorrect ones
- Retrain and test
- Add the Timer Code
- Now we track how long each flight phase lasts.
- Explain:
- Variables track time for each movement
- When movement starts → timer runs
- When movement stops → time is stored
- Controls (if using the original BBC micro:bit exercise timer code replace all exercising working with “flying” and all not exercising with “not flying”):
- Button A → show not time
- Button B → show not flying time
- Walk students through creating the following code or use the completed code link (provided within MakeCode) to share the completed code with students.
- Open project in MakeCode
- Test the Flight and timer System
- Introduce the Activity
- Today, you’re going to teach a micro:bit and CreateAI to recognize and track the movements of a plane we make in class.
- Describe types of plane movements and non movements.
- Introduce AI & Machine Learning
- Machine learning means teaching a computer using examples instead of step-by-step instructions.
- Explain simply:
- You give examples (dataset)
- The computer finds patterns in the data
- It predicts what new inputs are
- We’re going to teach it to recognize movements
- Define Flight Movements
- Recognize that there are many types of flight movements for an airplane, but in order to more age appropriate we are only going to ask that the AI recognize when the plane is is “flying” or “not flying”
- Flying → any in the air motion, in the air loops, etc.
- Not flying → no motion
- TIP: make sure your “flying” motion is not a steady straight line or the AI can confuse this for the plane at rest.
- Collect Training Data
- Open CreateAI –
- Option 1: use the existing “AI exercise timer” code links and rename the project and the data. Also create new LED images.
- Option 2: Create a new project in CreateAI
- Name your actions “Flying” and “Not flying”
- Record multiple samples for both actions. Try to make the movements in each action data set different from each other.
- Open CreateAI –
- Train & Test the Model
- Train the Model and Connect your micro:bit
- Students:
- Train model
- Test movements
- Students:
- Discuss:
- Does it recognize each phase correctly?
- Where does it get confused?
- Train the Model and Connect your micro:bit
- Improve the Model (Iteration)
- AI gets better with better data. Are there any classes that need more data to help improve the accuracy of detecting the movements correctly?
- Students:
- Add more sample data to the classes
- Remove incorrect ones
- Retrain and test
- Add the Timer Code
- Now we track how long each flight phase lasts.
- Explain:
- Variables track time for each movement
- When movement starts → timer runs
- When movement stops → time is stored
- Controls (if using the original BBC micro:bit exercise timer code replace all exercising working with “flying” and all not exercising with “not flying”):
- Button A → show not time
- Button B → show not flying time
- Walk students through creating the following code or use the completed code link (provided within MakeCode) to share the completed code with students.
- Open project in MakeCode
- Test the Flight and timer System
Assessment Opportunities
Reflection:
- What helped your AI recognize movements?
- What caused mistakes?
- How did the timer work with the AI?
- How is this different from regular coding?
Reflection:
- What helped your AI recognize movements?
- What caused mistakes?
- How did the timer work with the AI?
- How is this different from regular coding?
Reflection:
- What helped your AI recognize movements?
- What caused mistakes?
- How did the timer work with the AI?
- How is this different from regular coding?
Extension Opportunities
Students can:
- Add a “crash” or “loop-the-loop” movement
- Create a flight scoring system
- Add sound effects for each phase
- Design a physical airplane holder (maker connection)
- Compare models between groups
Students can:
- Add a “crash” or “loop-the-loop” movement
- Create a flight scoring system
- Add sound effects for each phase
- Design a physical airplane holder (maker connection)
- Compare models between groups
Students can:
- Add a “crash” or “loop-the-loop” movement
- Create a flight scoring system
- Add sound effects for each phase
- Design a physical airplane holder (maker connection)
- Compare models between groups